Saturday, October 8, 2016

Digital Forensics:การเก็บรวบรวมหลักฐานโทรศัพท์เคลื่อนที่ (Evidence collection)

Digital Forensics:การเก็บรวบรวมหลักฐานโทรศัพท์เคลื่อนที่ (Evidence collection)

(1) ห้ามบุคคลที่ไม่มีส่วนเกี่ยวข้องเข้าไปในสถานที่เกิดเหตุ 

(2) ควรสวมถุงมือระหว่างการปฏิบัติงานในสถานที่เกิดเหตุ 

Forensic Imaging & DATA Extraction

(3) กำหนดรูปแบบการตรวจค้นสถานที่เกิดเหตุและดำเนินการตามที่กำหนดอย่างถี่ถ้วน 

(4) กำหนดหมายเลขและวางป้ายหมายเลขกำกับหลักฐานแต่ละชิ้น

Forensic Imaging & DATA Extraction

(5) ถ่ายภาพรายละเอียดต่อไปนี้ 

(5.1) หากพบเครื่องมือสื่อสารเคลื่อนที่ ให้ถ่ายภาพทุกด้านและพื้นที่รอบ ๆ หลักฐานที่จะจัดเก็บ อุปกรณ์เชื่อมต่อภายนอกและจุดเชื่อมต่อ รวมทั้งสภาพโดยรวมให้ เห็นว่าหลักฐานแต่ละชิ้นวางไว้ในตำแหน่งใด 

(5.2) ข้อมูลเฉพาะของหลักฐาน เช่น หมายเลข Serial number ผู้ผลิต รุ่น ความเสียหายที่พบ เป็นต้น

(5.3) สิ่งอื่นที่อาจเป็นประโยชน์เพิ่มเติม เช่น สิ่งพิมพ์ กระดาษบันทึกข้อความ หรือหนังสือ เกี่ยวกับความรู้ทางคอมพิวเตอร์เพื่อบ่งบอกถึงระดับความรู้ทางคอมพิวเตอร์ของผู้ต้อง สงสัย

(6) จดบันทึกรายละเอียดต่อไปนี้

(6.1) สิ่งที่พบ สิ่งที่ได้ดำเนินการ รวมถึงสิ่งผิดปกติเช่น ร่องรอยความเสียหายภายนอกของ หลักฐาน 

(6.2) สภาพและรายการอุปกรณ์ภายนอกที่เชื่อมต่อกับหลักฐาน 

(6.3) สิ่งอื่นที่อาจเป็นประโยชน์เพิ่มเติม เช่น สิ่งพิมพ์ กระดาษบันทึกข้อความ หรือหนังสือ เกี่ยวกับความรู้ทางคอมพิวเตอร์เพื่อบ่งบอกถึงระดับความรู้ทางคอมพิวเตอร์ของผู้ต้อง สงสัย 

(7) กรณีพบหลักฐานอยู่ภายนอกอาคาร และสภาพอากาศขณะนั้นอาจส่งผลต่อหลักฐาน ควร พิจารณาดำเนินการกับหลักฐานนั้นเป็นลำดับแรก 

(8) รวบรวมข้อมูลที่เกี่ยวข้อง เช่น ชื่อผู้ใช้ รหัสผ่าน ข้อมูลในการเข้าใช้งานระบบปฏิบัติการ หรือ ระบบเครือข่าย การใช้เทคโนโลยีเฉพาะ เช่น   การเข้ารหัสลับข้อมูล (Encryption) เป็นต้น


กรณีหลักฐานเป็นเครื่องมือสื่อสารเคลื่อนที่ 

(1) หากทำได้ ให้สอบถามรหัสผ่านเพื่อปลดล็อคเครื่องและซิมการ์ด และจดบันทึกโดยให้ระบุด้วย ว่าเป็น PIN หรือ Pattern lock 

Photo illustration by Aurich Lawson

(2) ในกรณีที่หลักฐานเปิดใช้งานอยู่ และสามารถเข้าใช้งานได้ ควรดำเนินการดังนี้ 

(2.1) ตรวจสอบรายละเอียดเกี่ยวกับหลักฐาน และตั้งค่าเครื่องมือสื่อสาร ดังนี้ 

ก. บันทึกภาพหลักฐานและเนื้อหาที่ปรากฏบนหน้าจอแสดงผล และจดบันทึกข้อมูล โดยละเอียด 

ข. ตรวจสอบข้อมูลเฉพาะของหลักฐาน เช่น IMEI รุ่น ผู้ให้บริการ เป็นต้น 

iPhone IMEI Check
iPhone IMEI Check  (Photo by Jarod Lee).

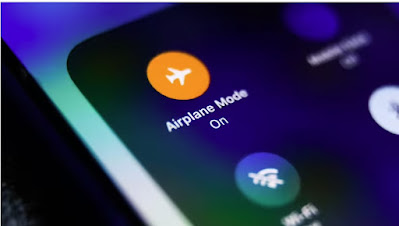
ค. เปิดการใช้งานโหมดเครื่องบิน (Airplane mode) เพื่อตัดการรับสัญญาณ 
Forensic Imaging & DATA Extraction
(Photo by Jakub Porzycki/NurPhoto via Getty Images).

ง. ปิดการใช้งานสัญญาณไร้สาย (Wi-Fi) เพื่อตัดการสื่อสารผ่านระบบเน็ตเวิร์ก 

จ. ปิดการใช้งานสัญญาณบลูทูธ (Bluetooth) 

ฉ. ปิดการใช้รหัสผ่าน เพื่อให้สามารถเข้าถึงเครื่องได้ภายหลัง 

ช. ปิดการล็อคหน้าจอแสดงผล (Disable screen lock) 

(2.2) ดำเนินการบรรจุและเคลื่อนย้ายหลักฐาน 

(3) กรณีที่ไม่สามารถเข้าใช้งานหลักฐานได้ เช่น ติดล็อครหัสผ่าน ให้บันทึกภาพหลักฐานและ เนื้อหาที่ปรากฏบนหน้าจอแสดงผล และจดบันทึกโดยละเอียด หลังจากนั้นจึงดำเนินการบรรจุ และเคลื่อนย้ายหลักฐาน 

Forensic Imaging & DATA Extraction

(4) กรณีที่หลักฐานอยู่ในสถานะปิดการใช้งาน ให้ดำเนินการบรรจุและเคลื่อนย้ายหลักฐาน 

(5) ไม่ควรถอดแบตเตอรี่ออกจากตัวเครื่องเนื่องจากอาจทำให้สูญเสียข้อมูล เช่น ประวัติการโทร การ ตั้งค่าวันเวลาในหลักฐาน เป็นต้น เว้นแต่ในกรณีที่จำเป็นต้องเก็บเครื่องเป็นระยะเวลานาน ควร ถอดแบตเตอรี่ออกเพื่อป้องกันแบตเตอรี่เสื่อมสภาพซึ่งอาจทำให้สารที่อยู่ในแบตเตอรี่รั่วซึมและ ก่อให้เกิดความเสียหายแก่หลักฐานนั้นได้ 

(6) เก็บอุปกรณ์เสริมทั้งหมด เช่น สายเคเบิลสำหรับชาร์จไฟ สายเคเบิลข้อมูลสำหรับต่อเชื่อม SD card ซิมการ์ด เป็นต้น รวมทั้งตรวจดูบริเวณรอบ ๆ ว่ามีการจดรหัสผ่านไว้หรือไม่ หากพบให้ รวบรวมไว้

Photo: Michael Hession ELECTRONICSACCESSORIES

(7) หากพบเครื่องมือสื่อสารเคลื่อนที่อยู่ในน้ำ ให้รีบถอดแบตเตอรี่ออกทันที แล้วจัดเก็บอุปกรณ์ ในสภาพที่มีน้ำในแหล่งที่พบหลักฐานอยู่ และนำกลับไปตรวจวิเคราะห์ในห้องปฏิบัติการ โดยเร็ว 

การบรรจุและการเคลื่อนย้าย (Packaging and Transportation)

(1)กรณีหลักฐานเป็นเครื่องมือสื่อสารเคลื่อนที่ซึ่งสถานะของเครื่องเปิดใช้งานและติดรหัสผ่าน ทำให้ ไม่สามารถตั้งค่าอุปกรณ์เพื่อตัดสัญญาณได้ ให้บรรจุหลักฐานลงในอุปกรณ์ป้องกันคลื่นสัญญาณ ก่อน แล้วจึงดำเนินการในขั้นตอนต่อไป 

Forensic Imaging & DATA Extraction

(2)จัดเก็บหลักฐานลงในบรรจุภัณฑ์ ใช้เทปปิดผนึกปิดผนึกหลักฐานให้เรียบร้อย ไม่ให้มีรอยชำรุดฉีก ขาด ลงชื่อผู้ปฏิบัติงานและวันเวลาคร่อมทับเทปปิดผนึกกำกับไว้ 

Forensic Imaging & DATA Extraction

mobile phone evidence box


(3)ติดป้ายหมายเลขกำกับ (Label) หลักฐานลงบนบรรจุภัณฑ์ทุกชิ้น โดยห้ามติดบนหลักฐานโดยตรง
Forensic Imaging & DATA Extraction

(4)ในการดำเนินการควรระบุรายละเอียดใน Chain of custody โดยบันทึกข้อมูลให้ครบถ้วน

(5)ควรขนย้ายหลักฐานมายังยานพาหนะเป็นลำดับสุดท้ายก่อนที่จะออกจากสถานที่เกิดเหตุและขน ย้ายหลักฐานไปเก็บในที่ปลอดภัยทันทีที่ถึงจุดหมายปลายทาง 

(6)เคลื่อนย้ายหลักฐานด้วยความระมัดระวังเป็นพิเศษ หลีกเลี่ยงการกระทบกระเทือน การวาง หลักฐานซ้อนทับกัน บริเวณที่มีสนามแม่เหล็กไฟฟ้าหรือไฟฟ้าสถิต เช่น ใกล้ลำโพงและวิทยุสื่อสาร เป็นต้น บริเวณที่มีแสงแดดจัดหรือมีความชื้นและการเปลี่ยนแปลงของอุณหภูมิหรือความชื้น กะทันหัน 

(7)ในการรับและส่งมอบหลักฐาน ก่อนส่งมอบให้สังเกตสภาพบรรจุภัณฑ์ว่าชำรุดหรือไม่ เทปปิดผนึก ฉีกขาดหรือไม่ และถ่ายภาพสภาพหลักฐานที่ได้รับมา 

ภาคผนวก ข ข้อมูลเพิ่มเติมทางเทคนิค 

ข.1 การเทียบเวลา ระหว่างกระบวนการเก็บหรือสำเนาหลักฐานดิจิทัล ผู้ปฏิบัติงานจำเป็นต้องเทียบเวลาของหลักฐาน ดิจิทัล กับเวลามาตรฐาน และให้บันทึกความคลาดเคลื่อนจากเวลามาตรฐาน โดยให้บันทึกเป็นหน่วย ของเวลาระดับที่ละเอียดที่สุดที่จะทำได้ ตัวอย่างของเวลามาตรฐาน ได้แก่ เวลาจากนาฬิกามาตรฐาน ของสถาบันมาตรวิทยาแห่งชาติ (รายละเอียดของนาฬิกาอ้างอิงสามารถดูเพิ่มเติมได้ที่ http://www.nimt.or.th/index.php?menu=time) 

ข.2 การตรวจสอบข้อมูลที่สำคัญในเครื่องมือสื่อสารเคลื่อนที่ ตามหลักการแล้ว ผู้ปฏิบัติงานไม่ควรเปิดดูข้อมูลในเครื่องมือสื่อสารเคลื่อนที่โดยไม่จำเป็น เพราะจะทำ ให้ข้อมูลในหลักฐานเปลี่ยนแปลง แต่เพื่อประโยชน์ในการสืบสวน ก่อนที่จะสำเนาข้อมูลหรือส่งตรวจ ในห้องปฏิบัติการ ผู้รับผิดชอบคดีอาจพิจารณาตรวจดูเฉพาะข้อมูลที่สำคัญอย่างระมัดระวัง และทำให้ ข้อมูลเปลี่ยนแปลงน้อยที่สุด โดยตรวจสอบข้อมูลดังนี้ 

(1) ตรวจสอบ IMEI โดยกด *#06# 

(2) ตรวจสอบหมายเลขโทรศัพท์ โดย 

ก. สำหรับเครือข่าย AIS กด *545# แล้วกดโทรออก 

ข. สำหรับเครือข่าย DTAC กด *102# แล้วกดโทรออก 

ค. สำหรับเครือข่าย TRUE กด *933# แล้วกดโทรออก 

(3) ตรวจสอบชื่อบัญชีของแอปพลิเคชันที่ใช้ติดต่อสื่อสาร เช่น อีเมล, LINE และ Facebook เป็นต้น


อ่านเพิ่มเติม: 

ที่มา:ข้อเสนอแนะมาตรฐานการจัดการอุปกรณ์ดิจิทัล ในงานตรวจพิสูจน์พยานหลักฐาน (สํานักพัฒนาธุรกรรมทางอิเล็กทรอนิกส์)

หมายเหตุ:เนื้อหาในเว็บไซต์นี้มีขึ้นเพื่อวัตถุประสงค์ในการให้ข้อมูลและเพื่อการศึกษาเท่านั้น

* หากมีข้อมูลข้อผิดพลาดประการใด ขออภัยมา ณ ที่นี้ด้วย  รบกวนแจ้ง Admin เพื่อแก้ไขต่อไป
ขอบคุณครับ

#WindowsForensic #computerforensic #ComputerForensics #dfir #forensics #digitalforensics #investigation #cybercrime #fraud #พยานหลักฐานดิจิทัล

Digital Forensics:Live Linux bootable USB

Digital Forensics:Live Linux bootable USB

How to image a Mac with Live Linux bootable USB

One thing I've learned when it's comes to imaging Macs is it's good to have options.
When encountering Macs, its seems like there is always a challenge.
No firewire ports for target disk mode, no easy way to remove the hard drive,
or if the the hard drive is removed,
you don't have the specific adapter needed to connect your write blocker to the drive...
and of course, encryption. I am planning on doing several blog posts about
different ways to image a Mac.Depending on the situation, some may work,
some may not, but I just wanted to throw some options out in the Google soup mix.


The first option I am going to go walk through is imaging a Mac with a Live Linux bootable USB. Many times cracking open something like a MacBook Air to grab a hard drive requires special tools and adapters which may not be readily available. If the Mac is already powered off, booting the Mac with a live Linux distro may be a good option. Once booted into Linux, an imaging tool with a GUI, like Guymager, can be used to create an image in E01 or dd format.

For this post, I have selected the CAINE distro. CAINE stands for Computer Aided Investigated Environment. This distro was made specifically for computer forensics. Upon boot, CAINE "blocks all the block devices (e.g. /dev/sda), in Read-Only mode." The examiner must take active steps, which includes nice big warnings, to turn off this feature.

While I did get Kali to work, it did not seem to offer the extra protection that CAINE did to keep the examiner for inadvertently mounting the wrong drive. If you are interested in making a Kali bootable USB drive for the Mac, I have included some brief instructions at the bottom of the post.

This method was tested with CAINE 7.0, Rufus 2.9, and a MacBook Air Early 2015 model 

Create the Bootable USB 

The first step is to create a bootable USB drive on a Windows machine. Download the CAINE iso and Rufus. Rufus is the Windows program that will create a bootable USB drive from the iso. Simply launch Rufus and select the CAINE iso as well as a blank USB drive bigger than 4GB. (NOTE - I tried various other tools to create the bootable USB drive, and not all of them worked when it came time to boot the Mac. Thanks to @APFMarc for the tip on Rufus). Below is a screen shot with the settings I used:

There was a pop up dialog box when I clicked start asking me to choose to write in ISO image mode or DD Image mode. I used the default, which was ISO mode. 

Boot into Linux

Once completed, this USB drive can be used to boot the Mac. In order to boot a Mac from a USB device, it must be put into Startup Mode. This is done by holding down the Alt/Option button when the systems boots. Once in Startup Mode, the boot device can be selected. The CAINE USB should show up as the EFI Boot choice:


After CAINE boots, choose the "Boot Live system". If all goes well, the following desktop should appear: 


CAINE has a utility called Mounter, which is located in the task bar. It's the tiny icon circled above. Double clicking this icon brings up a dialog box that shows which block devices are currently mounted:


 As demonstrated in the screen shot above, the only device that is currently mounted is the USB containing the CAINE distro (Shown as CAINLIVE). Running the df command also confirmed this:


The reason I like CAINE is that it does not let the examiner inadvertently mount a drive by accidentally clicking on something. For example, when I double clicked the Macintosh HD it gave me an error: 


From the CAINE website documentation: 
This new write-blocking method assures all disks are really preserved from accidentally writing operations, because they are locked in Read-Only mode.
If you need to write a disk, you can unlock it with BlockOn/Off or using "Mounter" changing the policy in writable mode. 
I personally prefer this extra layer of protection.

Mount the USB drive that will hold the image

Next, an external USB drive is needed to dump the image on. This external device needs to be mounted writable so the image can be placed on it. To do this, Read only mode needs to be turned off for any newly attached devices by using the Mounter program. Right clicking the Mounter icon in the task bar brings up the following dialog box:


I know this looks scary, all in red and what not, but clicking it brings up another dialog box confirming that this action will only make newly mounted devices writable, which is what is needed so the image can be dumped to the external drive:


After selecting Yes, a brief confirmation message pops up and the icon in the tray also turns red indicating the current status:

The next step is to plug in the USB drive that will contain the image. I named my external USB drive "Images" and formatted it with NTFS on a Windows system before beginning this process (FAT32 will work as well, just be aware of the 4GB file limit). Once the drive is plugged in, it can be mounted by opening up the "Caine's Home" folder on the desktop and double clicking the drive. This will mount the drive to /media/CAINE/YourDriveName:


Now the drive can be accessed to create folders, dump the image to etc. Note - if I try and do the same with the other devices on the host drive (e.g. BOOTCAMP and Macintosh HD), it will give me an error, thereby preventing me from accidentally mounting them.

Use Guymager to create the image

Now that the external USB drive is mounted, Guymager can be started to to create the image. Guymager is found on the Desktop, or under Menu>Forensic Tools>Guymager.

Once launched, select the device that needs to be imaged by right clicking it. In this example, the drive I want is the "ATA Apple SSD SM0256G":


The next step is to fill out all the requisite image data:


Once started, the previous table will show a status on the imaging process. When the image is complete Guymager will create a log file in the same directory as the image. An interesting tidbit - a while back, Eric Zimmerman did some testing on various imaging tools, and Guymager was one of the fastest :)


Kali live Linux bootable USB for Mac 

So far, I've only found one method that works consistently to boot into Kali Linux on a Mac (at least on my test Mac). That method is to use the Mac Linux USB Loader on a Mac to create the bootable USB.

There is a video here that has step by step instructions for the Mac Linux USB Loader, but it's pretty straight forward to use. The basic steps are 1) Download Kali Linux; 2) Using Disk Utilities on Mac to format a USB drive with Fat32 and MBR; 3) Run Mac Linux USB Loader and select the Kali Iso; 4) Choose Kali from the distro type

You can now boot into Kali and use Guymager on a Mac using the same steps I detailed in the sections above. One very important thing to note - using this method will automatically boot you into the Kali Live environment and you will not be given the choice for the Kali Linux Forensics Mode.

In my limited testing it does not appear to mount the host drive, or make any changes to the drive. It also does not have the additional steps and warnings when it comes to inadvertently mounting drives that CAINE does. The Live version will also auto-mount plugged in USB devices. Proceed at your own risk, and as they state on the Kali website:
If you plan on using Kali for real world forensics of any type, we recommend that you don’t just take our word for any of this. All forensic tools should always be validated to ensure that you know how they will behave in any circumstance in which you are going to be using them
Echoing these same sediments, although I have walked though a method of imaging a Mac from a live Linux distro, please test and validate before using either of these methods in the the real world.
 Referent:
 https://bit.ly/2y6XQGR

หมายเหตุ:เนื้อหาในเว็บไซต์นี้มีขึ้นเพื่อวัตถุประสงค์ในการให้ข้อมูลและเพื่อการศึกษาเท่านั้น

* หากมีข้อมูลข้อผิดพลาดประการใด ขออภัยมา ณ ที่นี้ด้วย  รบกวนแจ้ง Admin เพื่อแก้ไขต่อไป
ขอบคุณครับ

#WindowsForensic #computerforensic #ComputerForensics #dfir #forensics
#digitalforensics #investigation #cybercrime #fr

DIGITAL FORENSICS:CompTIA Security+ Course สอบ

DIGITAL FORENSICS:CompTIA Security+ Course สอบ
วิชา ระบบความมั่นคงปลอดภัย


CompTIA Security+ คือใบรับรองทางมาตรฐานวิชาชีพที่เป็นกลางไม่อิงผู้ขายและผู้ผลิตอุปกรณ์รายใด ข้อสอบ CompTIA Security+ เป็นที่ยอมรับในระดับสากลด้านความรู้และทักษะการรักษาความปลอดภัยในระดับซึ่งเป็นรากฐาน และถูกนำไปประยุกต์ใช้อย่างแพร่หลายโดยองค์กรและผู้เชี่ยวชาญด้านการรักษาความปลอดภัยทั่วโลก

Cybersecurity Specialist Certifications

Exam Objectives (Domains)

CompTIA Security+ focuses on five major cybersecurity domains. Each domain and the measure to which it is represented in the exam are listed as follows: [+]

DomainPercentage of Examination
Attacks, Threats, and Vulnerabilities24%
Architecture and Design21%
Implementation25%
Operations and Incident Response16%
Governance, Risk, and Compliance14%

(1) Attacks, Threats, and Vulnerabilities

  • เปรียบเทียบความคล้ายและความแตกต่างของเทคนิควิศวกรรมสังคมประเภทต่าง ๆ
  • วิเคราะห์สัญญาณบ่งชี้ที่เป็นไปได้เพื่อระบุประเภทการโจมตี
  • วิเคราะห์สัญญาณบ่งชี้ที่เกี่ยวข้องกับการโจมตัแอปพลิเคชัน
  • วิเคราะห์สัญญาณบ่งชี้ที่เกี่ยวข้องกับการโจมตีเครือข่าย
  • อธิบาย Threat Actor , Vector และแหล่งข่าวกรองต่าง ๆ
  • อธิบายข้อกังวลด้านการรักษาความปลอดภัยที่เกี่ยวข้องกับช่องโหว่ประเภทต่าง ๆ
  • สรุปเทคนิคที่ใช้ในการประเมินการรักษาความปลอดภัย
  • อธิบายเทคนิคที่ใช้ในการทดสอบเจาะระบบ
(2) Architecture and Design

  • อธิบายความสำคัญของแนวคิดด้านการรักษาความปลอดภัยในสภาพแวดล้อมองค์กร
  • สรุปแนวคิดเกี่ยวกับระบบเสมือนและการประมวลผลแบบ Cloud
  • สรุปแนวคิดเกี่ยวกับการพัฒนาแอปพลิเคชันที่ปลอดภัย การใช้งาน และการทำงานอัตโนมัติ
  • สรุปแนวคิดการออกแบบการตรวจสอบสิทธิ์และการอนุญาต
  • ใช้การเตรียมพร้อมรับมือด้านความปลอดภัยทางไซเบอร์
  • อธิบายผลกระทบด้านการรักษาความปลอดภัยจากระบบฝังตัวและระบบเฉพาะทาง
  • อธิบายควาสำคัญของการควบคุมการรักษาความปลอดภัยแบบ Physical Security
  • สรุปพื้นฐานแนวคิดเกี่ยวกับ Cryptographic
(3) Implementation

  • การใช้ Secure Protocol
  • การใช้โซลูชั่นด้านการรักษาความปลอดภัยของโฮสต์ หรือ แอปพลิเคชัน
  • การใช้ Secure Network Design
  • การติดตั้งและกำหนดการตั้งค่า Wireless Security
  • การใช้โซลูชั่น Secure Mobile
  • การปรับใช้โซลูชันความปลอดภัยทางไซเบอร์กับ Cloud
  • การควบคุม Identity และการบริหารจัดการแอคเคาท์
  • การใช้โซลูชั่นตรวจสอบสิทธิ์และการอนุญาต
  • การใช้โครงสร้าง Public Key
(4) Operations and Incident Response

  • การใช้เดรื่องมือที่เหมาะสมเพื่อประเมินการรักษาความปลอดภัยขององค์กร
  • สรุปความสำคัญของ Policy , Process และ ขั้นตอนการทำ Incident Response
  • การใช้แหล่งข้อมูลที่เหมาะสมเพื่อสนับสนุนการสืบสวนสอบสวน
  • การใช้เทคนิคเพื่อควบคุมหรือลดความเสียหายเพื่อรักษาความปลอดภัยของสภาพแวดล้อม
  • อธิบายหลักการสำคัญของ Digital Forensics
(5) Governance, Risk, and Compliance

  • เปรียบเทียบความคล้ายและความแตกต่างของ Control ประเภทต่าง ๆ
  • อธิบายความสำคัญของข้อบังคับ มาตรฐาน หรือ Framework ที่มีผลบังคับใช้กับ Security Posture ขององค์กร
  • อธิบายความสำคัญของ Policy ต่อการรักษาความปลอดภัยขององค์กร
  • สรุปแนวคิดและกระบวนการจัดการความเสี่ยง
  • อธิบายแนวคิดด้าน Privacy และ Sensitive Data ที่เกี่ยวข้องกับการรักษาความปลอดภัย

clipboard Exam Structure

  • Maximum of 90 questions
  • Questions are multiple-choice and performance-based (using simulations of things like firewalls, networks diagrams, or operating systems)
  • Passing score is 750 (on a scale of 100-900)

  • Section 1 – Attacks, Threats, and Vulnerabilities

  • Section 2 – Architecture and Design

  • Section 3 – Implementation

  • Section 4 – Operations and Incident Response

  • Section 5 – Governance, Risk, and Compliance


  • SY0-601 Security+ Study Group Replays

Comptia security Sy0-601

CompTIA Security+ Passed

CompTIA Security+  SY0-601

อ่านเพิ่มเติม CompTIA Security+  cheat sheet

                         SY0-601


Ref:
7 คำถามทดสอบ CompTIA Security+ (SY0-601) ,ARIT ,October 25, 2022


หมายเหตุ:เนื้อหาในเว็บไซต์นี้มีขึ้นเพื่อวัตถุประสงค์ในการให้ข้อมูลและเพื่อการศึกษาเท่านั้น

* หากมีข้อมูลข้อผิดพลาดประการใด ขออภัยมา ณ ที่นี้ด้วย  รบกวนแจ้ง Admin เพื่อแก้ไขต่อไป
ขอบคุณครับ

#WindowsForensic #ComputerForensics #dfir #forensics #digitalforensics #computerforensic #investigation #cybercrime #fraud

หลักสูตร ความมั่นคงปลอดภัยทางไซเบอร์ (Practical Cybersecurity and Digital Forensics)

หลักสูตร ความมั่นคงปลอดภัยทางไซเบอร์ (Practical Cybersecurity and Digital Forensics) Photo credit: BU Lifelong Learning Center FB เปิดรับสม...