DIGITAL FORENSICS: Investigation using OSForensics (Part1)
Step 1 - Download USB Drive Images
In this task, you will download the USB drive images from a local intranet site.
These USB drive images were collected from digitalcorpora.org web site.
Right-click USB zip file and select Extract All…
Right-click USB zip file and select Extract All…
Step 2
Click Start charm to access the Start screen.
When Start screen opens, type: OSforensics On the OSForensics welcome message box, click Continue Using Free Version.
Step 3
In the New Case dialog box, enter your name in the Investigator text box. In the Case Name text box, type CF-DFE-002 USB drive.
 |
| CF-DFE-002 |
Step4
Step 5
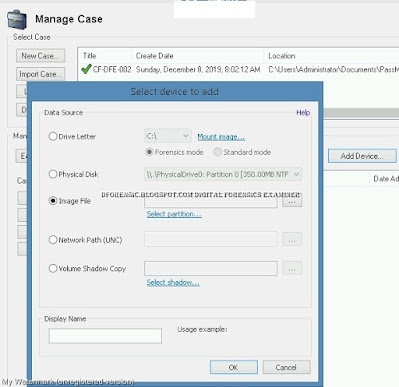
Click the work-usb-2009-12-11.E01 filename at the lower right, and then click the Open button to the left to open the File System Browser window.
Step 6
In the Select a partition in the image dialog box asking which partition to use, leave the default setting use entire image file, and then click OK.
Step 7
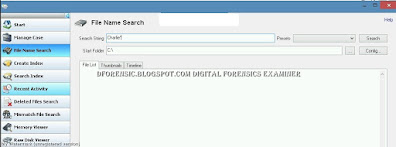
Click the File Name Search icon in the File System Browser window or the left pane of the main window. In the Search String text box, type Charlie*. On the far right, click the Search button.
 |
| File Name Search |
Step 8
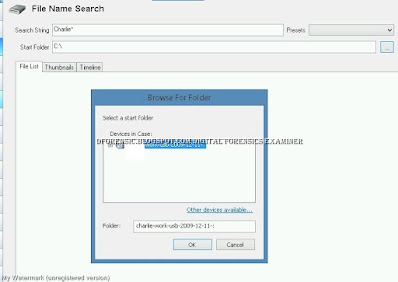
On the Browse for Folder dialog box, ensure that Devices in case refers to work-usb-2009-12-11.
Click OK. Back on File Name Search window, click Search.
Step 9
After a few moments a list of files found in USB drive is displayed.
Step 10
The files displayed in Thumbnails view.
Click Timeline tab.
Create Index
To create an index of files found in the user’s USB drive image, perform the following steps:
Step 11
Click the Create Index button in the left pane. (Note: You might have to click New Index if the window is showing the results from the index of USB drive.) In the Step click the Pre-determined File Types option button, click all the file types listed, and then click Next.
Step 12
click the Add button.
Step 13
On the Add Start Location dialog box, verify that Whole drive option is selected and work-usb-2009-12-11.E01 is listed.
Click OK.
 |
| Add Start Location |
Step 14
In the Step 3 of 5 window, in the Index Title text box, type: All File Type
Click Start Indexing.
 |
Index Title |
Step 15
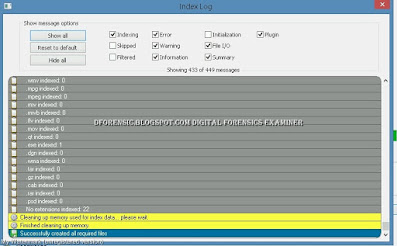
When the indexing is finished, click OK in the message box informing you that some errors might have occurred in the indexing process.
Step 16
The window that opens shows you the files that were indexed, any errors that occurred, and a summary of what was done. After examining the summary, close the window.
You should now be able to create a case, add it to your inventory, scan the files, and perform indexing, which will be useful later for searching.
Case Management: Cases are used to group together findings within OSForensics that can be exported or saved for later analysis.
ref:
osforensics
hackingarticles
#WindowsForensic #ComputerForensics #dfir #forensics #digitalforensics #computerforensic #investigation #cybercrime #fraud
หมายเหตุ:เนื้อหาในเว็บไซต์นี้มีขึ้นเพื่อวัตถุประสงค์ในการให้ข้อมูลและเพื่อการศึกษาเท่านั้น
* หากมีข้อมูลข้อผิดพลาดประการใด ขออภัยมา ณ ที่นี้ด้วย รบกวนแจ้ง Admin เพื่อแก้ไขต่อไป
ขอบคุณครับ


No comments:
Post a Comment